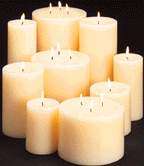
 Candlemaking
 Candlemaking
 Welcome
information is divided into the
following subject areas. check the supplier's section, too for candle
making equipment suppliers and other candle maker's web pages.
contents: click
one... waxes set up and
clean up
additives wicking moulds
projects making
the candles
scents colours beeswax burning
candles Troubleshooting![]() Suppliers
ADVERTISE on this page!: (US version) (AUSTRALIAN
version) E-mail Sharon
Suppliers
ADVERTISE on this page!: (US version) (AUSTRALIAN
version) E-mail Sharon ![]()
Last
Updated July, 1998 Created October 1996 This page has been
visited
times since June 1997
waxes
index ![]()
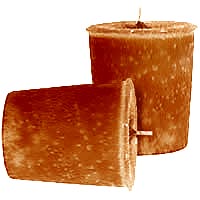
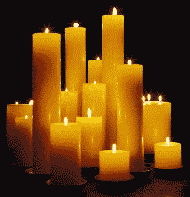
Paraffin Wax comes in different melting points. The type of candle you are making will determine which melting point to buy.
Paraffin is a petroleum by-product. It contains oil. The lower the melting temperature of the paraffin, the more oil content and the slower the burning. You want slow burning wax for container candles, and faster burning wax for moulded free-standing candles. Use the fastest burning wax for taper candles.
Mould Wax 59-62 degrees C (139-143 Fah). It has less oil in it, so it burns faster. This is good because the free-standing candle doesn't drip. Less oil in the wax also means it is firmer and retains its moulded shape well.
Dipping Wax 62 degrees C (145 Fah). This is the wax you use for making taper candles. It adheres to itself, so each dip will build upon the last to form the tapered candle.
Microcrystaline
wax: Unlike paraffin waxes, microcrystalline waxes
contain a large percentage of
branched and cyclic molecules. This decreases the
crystallinity of the
microcrystalline waxes, making them softer and more
pliable. They range in color
from white to brown, and in consistency from soft and
sticky to hard and dry.
For some great
information about waxes The International Group
Inc. then
click on 'what is wax'
moulds index![]()
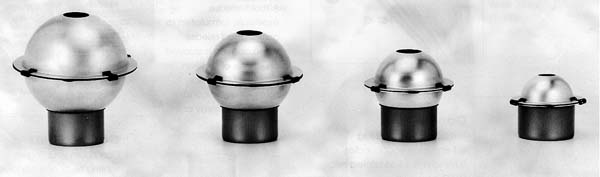

Two piece plastic moulds. The novelty figurine candles are usually made with this kind of mould. These are more work than the metal moulds because when your candle comes out of the mould there will be a seam running around it that needs to be hand smoothed off. Some pigments stain the plastic, and use of high concentrations of scent oils will damage the plastic making them unusable.
Soft rubber moulds. These are one piece, and easier to use than the two piece rigid plastic moulds. They come in many shapes like the plastic moulds (fruit, figurines, etc.). Cooling wax inside the mould can harden and distort the shape of these sometimes.
Hard rubber moulds. These are not as long lasting as the other kinds of moulds and can be more expensive. Results are good and they are very easy to use.
Acrylic and
plexiglass moulds. I have never used this type, but
books have indicated that they are easy to use, and
produce excellent quality candles. The bonus here would
be that you can see your candle through them ....good for
making candles with pressed flowers or herbs. I have had
good success with just sticking the herbs or flowers on
the candle after it comes out of my metal or home made
mould.
Other moulds and
containers. 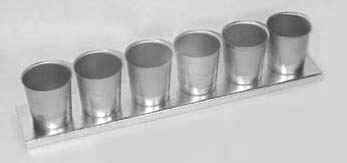
Milk cartons . They make nice candles of varying heights. I like a grouping of these large square candles, from 2 cm high to about 150 cm. The cartons just tear away when the candles are hard. You can easily make multi-wick candles using the milk cartons too. I love the patina finish on the candles you get when you use wax lined containers like milk cartons or frozen juice cans. These also make great multi-wick candles.
Canning Jars and baby food jars. Warm the jar before you pour the candle, it will reduce the incidence of bubbles forming, and help the paraffin to adhere to the sides of the jar. Glue the wick (with a wick tab) to the bottom of the jar, then pour your candle. The finished candle looks nice with the lid on and a ribbon around it for a gift. Glue whole spices to the lid for more decoration.
Small paper cups. These work well for the beeswax/paraffin blend. When the candles are hard, just tear away the cups!
Yoghurt containers, plastic margarine containers, wax or foil lined cartons such as hot chocolate mix, frozen juice cans . These recycled materials can make many different sizes of pillar candles and multi-wick candles that will look great in a grouping.
Make your own rubber moulds. Use a two-part compound called RTV silicone rubber. You shape the rubber around a favourite item to have a long-lasting candle mould of that exact shape with no seams.
Terra cotta pots of all shapes and sizes are charming filled with a candle. You seal up the hole in the bottom by lining the inside with a little aluminium foil, and the outside with sealing putty. You can paint the outside of the pot with craft spray paints, or use stencils. Other crafters have found it helpful to seal the pot with non-flammable varnish so the wax and colour doesn't seep into the terra cotta.
Galvanized buckets come in nice small shapes, just perfect for candle making as well. Try making citronella candles left in the buckets for outdoor use. Citronella candle scent is available from candle making or craft supply stores.
I recently tried making some 'industrial' or very rustic looking candles using corrugated cardboard. I made a mould from a sheet of cardboard in a cylindrical shape open at both ends for a pillar candle. I set the mould on a paper plate lined with foil. I sealed the base by pressing mould sealant putty all around the outside. Then I sprayed the inside of the mould and the foil on the bottom of the mould with silicone so I could peal off the card board after the candle hardened. I had some leakage when I poured the candle, but after a few minutes it stopped as the leaks hardened and formed a better seal. The candle came out nice and textured from the ribs of the corrugated cardboard after I tore it away. Some of the cardboard stuck to the candle, which enhanced the rustic look. I used 1 part beeswax and 3 parts paraffin with ivory colouring.
colours
index![]()
I use small candle making dye chips. They come in a packet of 8 chips. Each chip colours about 1/2 kilo ( 1 pound of wax.) Use more chips for deeper colours. I think I have seen about 30 shades for sale, and then you can get endless variety by mixing them for custom colour making! Dye also comes in liquid form and larger cake form and flake form.
scents
index![]()
Liquid candle making scents are available in 15 ml (1/2 oz) and larger bottles. One supplier recommends 15 ml for 1/2 kilo of wax (1/2 oz for 1 pound). Scent strength does vary according to the formulation - check with your supplier to find out what quantity to use with wax.
I have had some problems using essential oils not specifically made for candles. They did not mix well with the melted wax, leaving pitting and bubbles and mottling on the candle's finish and an oily residue on the candle surface. If in doubt, check with your supplier to make sure that their formulation will mix with wax. It depends on the type of carrier oil used in the scent.
I have used ground cinnamon, added to the melted wax just before pouring. You have to stir very well, and it still tends to settle in the bottom of your mould, but that effect is nice in a rustic style candle. Try other aromatic spices! Check below for instructions on hurricane candles to get an outer candle layer filled with herbs or other materials.
I have also added crushed and whole lavender flowers. They settle too, in a mould or container but the effect was attractive. And they add a wonderful aroma to a candle.
set up and clean up
index![]()
Use old bed sheets, wax paper or towels to cover your work surface. I just roll them up when I'm done and put them away in a box with the other candle making materials to reuse.
Put a couple of inches of water in an old sauce pan. Then put your wax in a metal container, preferably a pitcher for ease of handling. This container goes in the sauce pan on the burner, and this is how you melt your wax. The pitcher is easiest because it has a spout and a handle, and you can pour the melted wax better. You can also use a large juice can and just pinch the rim into a spout shape. A juice can would be hard to hold while pouring because of the heat of the wax. I don't wash my pitcher. I just melt all of the wax out of it when I'm finished and wipe the wax and colour residue out with a paper towel while it is still warm. Others have used crock pots, deep fat fryers and coffee urns fitted with brass spigots to melt paraffin.... with good success.
Clean Up
Don't pour wax down the drain. It will clog. Use a can to pour out waste wax, then throw the can away or re-melt the wax for later use.
Any spilt wax on a hard surface will just scrape off after it has cooled. If wax gets on clothing or cloth, you can pour hot water through it and the wax will mostly melt away with the pouring water. If wax gets in your carpet by some chance, let it harden and rub an ice cube on it to make it brittle, then scrape it out with a dull knife. Some wax will remain, and if its a noticeable colour, you can then melt it with a hot, wet cloth and sponge it up mostly with repeated treatments.
A correspondent suggested the warm iron treatment for stains on carpet or fabric. They had a red wax candle drip onto white carpet, and they found that "using a warm iron through paper towel got the colour out the best and cleanest".
I don't wash any of my tools, I just clean my moulds. It is important to have a wax and dust free mould for good candles. The candles will come out of the moulds easily, and they won't have marks or blemishes on them. Your moulds will not rust or deteriorate if you take good care of them. There is a cleaning solution for metal moulds that will remove wax. It is available at candle making supply shops. It is called chlorothene. It is a liquid that you pour into a dirty mould and swirl it around, then dump out. This is for stubborn stains and wax build up. For regular normal metal mould cleaning, just put the mould upside down on a foil lined cookie sheet in a 70 degree C (150 F) oven. Not hotter. The welds in the mould will melt. Heat the mould for 15 minutes this way, and the wax will simply run out onto the foil. Be sure not to scrape or scratch the inside of your mould. It will mar every candle you make in it from that point on. Also, be careful not to dent a mould. The candles will be very difficult to remove from the mould. Metal and glassware can simply be put in the dishwasher as well.
making the candles
index![]()
Break up your wax block by putting it in a plastic bag, and whacking it with a hammer. You can also just prise chunks off the main block with an old knife. Melt your wax over a medium burner in the saucepan and pitcher "double boiler" set up described above. Or, try the deep fryer to melt your wax as a correspondent suggests: "I find that using a fry daddy with adjustable heat to melt my wax works much better than the old double broiler. You just have to keep the heat very low until the wax starts to melt or the teflon coating bakes off. Once the wax goes into meltdown you just set the heat and your on your way. I then dip the wax with a plastic cup or punch ladle. I find this method much easier to control the temp of the wax, and once the power is off you just let the wax cool and it pops out in a block that fits back into the unit at a later date." For pouring wax into moulds the temperature of the melted wax should be between 85 and 95 degrees C (180 and 200 F) for blemish free candles. If you like interesting mottled patterns in your candles like I do, I don't bother taking the wax temperature. I just wait until it is fully melted and clear. If you want, you can use 3 parts paraffin wax and one part block beeswax. This will not be clear when it is melted. This mixture is harder to get out of a mould because of the sticky properties of the beeswax. Use silicone spray in your mould to get easier releasing candles. You can also put the mould in the refrigerator after its mostly cooled, for half-hour to help with the releasing. The blend of beeswax/paraffin produces lovely honey coloured candles with a lovely beeswax aroma. Other benefits of a beeswax/paraffin mixture are smoother candles without cracks or web like patterns caused by thermal shock in the cooling process. Beeswax doesn't shrink nearly as much as paraffin, so you will notice smaller or no wells forming down the middle of your candle as it cools - this means less or no refilling as it cools.
Prepare your moulds and containers while the wax is melting. You can spray inside each plastic or metal mould with silicone spray available at candle making supply stores. I recommend doing so, the candles always release from the mould easily this way. You can also use vegetable oil to lightly coat the inside of your moulds. If your mould has a hole in the bottom, thread the wick through here and seal it on the outside with rubber putty. Stretch the wick to the open end of the mould and suspend it here wrapped around a rod or pencil or something similar.
If you are making candles that stay in the container, or if your mould cannot be perforated with a wick hole, you can wick them two different ways that I can think of. When using flat braid wicking, make sure the braid grain or nap is going from top to bottom on your candle for even burning. An upside down wick will develop a carbonized ball on it as it burns and that will smoke and cause the candle to burn unevenly, and faster without utilizing the wax of your candle efficiently.
2. For a short container,
just pour your wax in and let it harden. Later take a
heated metal skewer or use a power drill and poke it
through the centre of the candle until you have a hole
for your wick. Insert your wick and you're done. You can
pour a little melted wax on top so it seeps down the hole
and fixes the wick better if you need to. This method is
useful if you're using Jell-O moulds or cake moulds,
where the bottom is the top of the candle, and you don't
want a wick tab on the top of your candle and you don't
want to put a hole in your mould for a wick.
Pouring the wax.
When your moulds and containers are ready, and your wax is melted, add the colour chips to your melting pitcher and melt fully into the wax. Then, at the last add your scent. The scent is added at the last so it doesn't denature or dissipate through too much heating for too long. Now you can pour your candles. If you're aiming for a very smooth surfaced candle, it helps to have the mould warmed and tilt the mould so the wax doesn't fill the mould so turbulently, and cause tiny air bubbles to form on the sides and surface of your candles. Save some wax to refill the candles as they cool. I keep wax in a melted state for hours because as the candles cool the wax in the moulds and containers contract and form a deep well right down the middle of your candle. Refilling this well may be necessary several times. If you have beeswax mixed in with your paraffin, the shrink well will not be as big, or need refilling as much. Be careful not to let your refill wax run over the top of the original candle level. The refill wax will run over and seep down inside between the candle and the mould and will mar your surface if you're going for perfect smoothness. It also makes it difficult to get a candle out of the mould.
Moulded candles can be made to look very even and shiny by cooling them in a cold water bath. About 1 minute after you pour, take the entire mould and set it in a container of cold water. Be careful not to get any water in your wax. It will ruin a candle. You will likely need to weight your mould so it doesn't float or tip in the water bath. Let the mould sit in its water bath after its second refill for about 2 hours. The final cooling process takes place at room temperature. It will take about 8 hours depending on the size of the mould for the candle to cool completely and be ready to remove from the mould. You can speed this final cooling process by putting candles in the refrigerator. Sometimes they will develop lines and tiny 'thermal shock' cracks which can be quite attractive. Remove the mould from the refrigerator after it feels cold to the touch. Any more cooling will result in many lines and tiny cracks, which means your candle surfaces will flake off later. If you desire this effect, you can put the cooling mould in the freezer for a half hour!
Remove the candles from the moulds.
If your finished candle has
seams in it, you can gently remove them with a knife. Flatten the
base of a wobbly candle by rubbing it gently around inside a warm
fry pan until it melts flat. Polish finished candles with nylon
stockings to remove fingerprints and small scratches. To get a
hard shiny protective surface on a candle apply liquid candle
sheen with a soft cloth. It is available at candle making supply
stores and it works great! A spray version is also
available. Others have used no-wax acrylic floor polish with good
results. These smell, but readers report that the smell
goes away when the wax hardens.
decorating ideas
index![]()
Water Balloon Candles
Fill a balloon with water
to the desired size. Dip the balloon in wax, make sure it
is somewhat cool. Continue dipping the balloon until a hard
shell has formed around it. Carefully pop the balloon at
the top, and empty out the water. Pull the balloon out of
the wax shell. Pour a small amount of wax (a different
colour from the first) into the shell. Roll it around in
the shell, making sure all areas are covered, until the wax is
dry. Continue doing this with different colours until the
shell is almost filled. Insert the wick during the last
fill. Once the candle is cool, use a potato peeler or
something similar to shave the top of the candle, making it
smooth and flat.
These candles turn out to look
something like a geode. They are a little time consuming,
but the end result is fantastic!!
Hope my suggestion comes in
handy!!
Michelle from Indiana
(Thanks Michelle for a
great idea!)
Fruit Candles

![]() Fruit candles are easy.
Fill a jar with water and your favourite colourful fruit
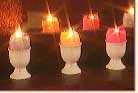
slices. Put a floater candle on top, and enjoy!
Fruit candles are easy.
Fill a jar with water and your favourite colourful fruit
slices. Put a floater candle on top, and enjoy!
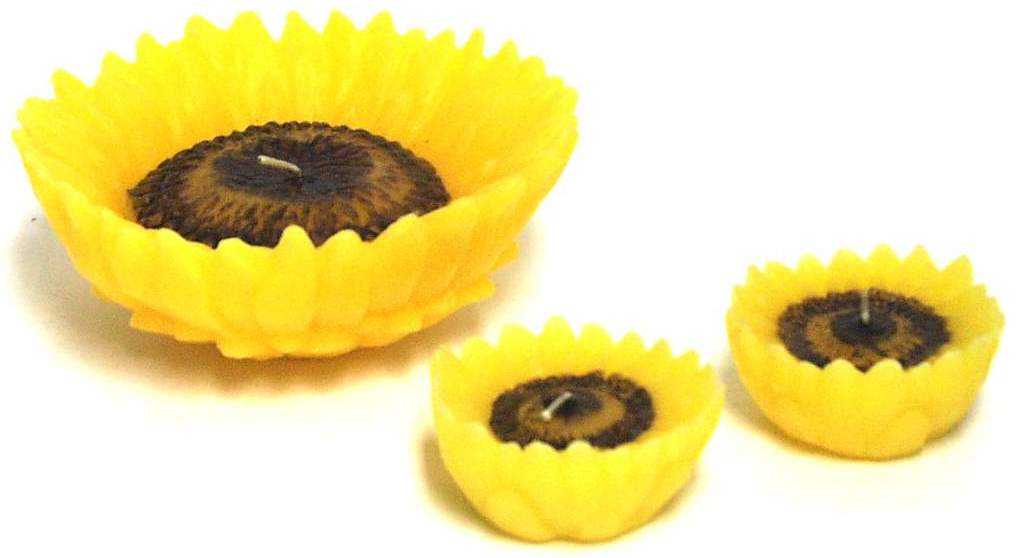
Ways to Attach Fruit, Herbs,
Flowers Leaves, and Spices
 Stick pressed
flowers or leaves to the outside of a finished candle by dipping
the flower in uncoloured melted wax and pressing it gently to the
surface of the candle. Then take the candle by the wick and dip
the whole thing into the melted wax once or twice to form a seal
over the flowers, but still let them show through the glow of the
burning candle. The most lightly coloured or non coloured
wax works best with this decorating idea. The flowers can be seen
better.
Stick pressed
flowers or leaves to the outside of a finished candle by dipping
the flower in uncoloured melted wax and pressing it gently to the
surface of the candle. Then take the candle by the wick and dip
the whole thing into the melted wax once or twice to form a seal
over the flowers, but still let them show through the glow of the
burning candle. The most lightly coloured or non coloured
wax works best with this decorating idea. The flowers can be seen
better.
Ground cinnamon or other
aromatic spices added to the melted wax are nice. They tend to
settle to the bottom of your candle a bit , but this looks nice.
Glitter and confetti can be used also.
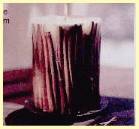
Stick whole cinnamon sticks
vertically around the outside surface of your candle by painting
one side of the stick with melted wax. You can also line your
mould with cinnamon sticks and a good deal of melted wax before
you pour the mould. Let it harden and then fill the rest of your
mould with wax. This gives a very rustic look.
Try the same techniques using
miniature candy canes for Christmas candles. The candle will have
a nice subtle sweet mint aroma.
Try attaching dried blood
orange slices, or whole spices to the outside of a finished
candle using melted wax and a paintbrush, or clear drying craft
glue such as Elmer's. To dry the fruit slices, put them in a 150
(65C) degree oven for several hours on a piece of parchment. You
can also dip the dried fruit slices right into melted clear
paraffin for a few seconds and then press them onto your candles.
Don't burn your fingers, use tweezers to hold the fruit and a
chop stick or tongue depressor to press the fruit onto your
candle.
Variations
on tapers
Making Bubbly candles on
purpose. Dipping a finished candle in melted paraffin that isn't
at its hottest will result in a thin layer of bubbles over your
candle surface which is very attractive in a rustic way. I made
some tapers, using 145 (62 C)degree melt point wax. For the
last two or three dips, I let the melted wax cool off to about
120 (50C) degrees.
Floral, Herbal, grubby and Hurricane Candles:
Make a paraffin pillar candle, wait till it's totally dry and set it inside a mould that's a little bigger around. Then sprinkle potpourri or dried herbs and flowers around the candle and fill around the sides with more wax. That way the flower pieces won't be in the middle part that burns. The outside wax should be a harder (higher melt point) wax than the inside candle so the outer floral shell doesn't melt.
I also made a regular moulded candle, let it cool completely and fixed some dried pressed flowers to the candle using melted wax and a paintbrush. To seal the flowers, I then dipped the whole candle in clear melted paraffin at a temperature of about 120 degrees (it was 138 melt point wax). I dipped it twice, and the flowers show through nicely, and there are bubbles in this outer layer of wax.
You can spray candles with
non flammable craft spray paints. An under layer of deep blue,
red or green looks nice with a dusting of gold or bronze paint
over it.
To make rustic looking candles
with a sandy looking surface, pour the wax cold... just as it
begins to thicken.
Cake
Candles, Whipped Wax 
You make a normal pillar
candle, let it cool and harden and remove it from the
mould. Then apply the outer coating of wax in whatever
style or effect you want:
To do this, just melt some
more paraffin. You can colour it if you want. Use a higher
melt point type of wax than used in the original candle if
possible.
Take it off the heat and use a
hand mixer or wire whisk to whip up the wax for a minute or
so. Then paint the whipped wax onto the outer surface of
your candle with a stiff paintbrush or a tongue depressor or
other stick type implement. It may help if you slightly
melt the outer surface of the core candle a bit with a hairdryer
or rub it around in an old fry pan. The new wax layer will
adhere better to a layer of slightly warm/melted wax.
I haven't tried this, but some
say a pinch of cream of tartar in the whipped wax helps it to
adhere better.
To make variations, add other materials to the whipped wax before you apply it to the candle: Sand , herbs, potpourri.
Or to get a stippling effect, apply the wax to the candle, then go over it in a gentle jabbing manner with a very stiff stencilling type brush at a 45 degree angle to the side of the candle.
Or, don't whip the wax, just paint it on thickly (let it cool a bit before you start) Then roll then entire candle in sand or dried herbs or potpourri and it will stick. Let this cool fully,
You can then over dip the
entire candle to seal it and give it a shiny surface if you wish.
The higher melt point
of the outer layer of wax will let it stay fairly intact while
the core candle burns down naturally. Then your herbs or
flowers won't get into the melt pool of the core candle and catch
on fire.
burning the candles
index![]()
beeswax  index
index![]()
Natural beeswax is golden in colour, stickier and has that lovely aroma. It comes in blocks, beads or honeycomb sheets. Melt 3 parts paraffin wax and 1 part block beeswax for great container candles. I have also used this mixture for moulded candles with good success, although they don't come out of the mould as easily as straight paraffin wax candles. Experiment with your ratio of beeswax to paraffin. For candles where you tear away the mould (such as juice cans, milk cartons) you can use a high concentration of beeswax, and not worry about it releasing from the mould. Use beeswax sheets (no melting required) to roll up into candles. Beeswax has a melt point of 62 C or 146 F. This high melt point can make a pure beeswax container candle burn improperly. The candle may burn a hole straight down the wick, leaving the majority of the wax unmelted around the sides of the container. Try using a blend of low melt point (54 C or 125 F) paraffin mixed with your beeswax instead if you have this problem.
Check your area for
apiaries. The bee keepers often sell natural beeswax, or even
coloured and scented block and sheet beeswax. Ask if they
filter it (to remove honeycomb and other material).
I recommend checking country
fairs and markets, or your area university's agricultural
extension service for local apiaries you can call and enquire
about beeswax. This will save you mailing expense for the heavy
wax. You can also buy unfiltered beeswax, melt it and pour
it through nylon stockings stretched over another container to
filter it yourself. One supplier offered unfiltered beeswax
for half the price of the filtered wax.
Midnite Bee Maine Beekeeping page and links to
bee pages. Beeswax information : How bees make
it, what it is used for, present day and historically.... most
fascinating!
index![]()
thank you for
visiting the candle making page ! Please
feel free to email me with contributions or questions:
![]() Sharon in
Parmelia, Western Australia Happy
Candle Making! Enjoy the Results!
Sharon in
Parmelia, Western Australia Happy
Candle Making! Enjoy the Results!